
Publishing your data with OGC API Features
From monitoring natural disasters to looking for the nearest vaccination centre, location-based data has become a critical part of our everyday lives. Under smart city initiatives, administrators are constantly looking for better solutions to distribute city-related datasets as a part of their Open Data initiatives. However, existing practices are complicated and lack standardization. These work well with professional software, but make it difficult for developers from different fields.
Read along if you:
- are tired of deciphering complex specifications,
- need a geospatial service that can be accessed by a variety of existing software,
- are looking for a solution to share data with ease and simplicity.
Let’s together explore the potential of the OGC API which solves these issues! It’s a modern solution designed on RESTful principles which adheres to the recommendations of the W3C Data on the Web Best Practices.
The Open Geospatial Consortium (OGC), through its OGC API family of standards, aims to define modular API building blocks to homogenize the integration of location information into any type of application. Furthermore, it is designed to make geospatial data and services FAIR - Findable, Accessible, Interoperable, and Reusable. As a result, the API enables the extensive discovery and querying of datasets and enhances their potential application and impact.
This blog post demonstrates a practical example of publishing a feature dataset using the OGC API Features standard. It provides the fundamental API building blocks to create, modify, and query ‘features’ on the web. Features include any kind of digital representation of objects from the real world. Part 1 of the standard only specifies access to vector data in WGS 84 Coordinate Reference System (CRS). Part 2 extends the capabilities to all CRS. The standard has been approved by the International Organization for Standardization (in Sept 2020) as well as endorsed as a Good Practice by the INSPIRE directive of the European Union (which helps to make spatial or geographical information more accessible and interoperable).
Numerous software packages have been developed that implement and conform to the OGC API Features standards. These consist of server implementations that can be used to set up APIs that implement the OGC API Features conformance classes and client implementations that connect to server APIs to fetch and use the feature data. Some of the examples for the server-side implementations are ldproxy, GeoServer, pygeoapi, and QGIS Server. Similarly, on the client-side ogcapi-js, FME, OWSLib, and QGIS are available. For demonstration, we will use an example of pygeoapi for server implementation and OWS Lib for client implementation. Both of them are Python based and are super easy to install and deploy in under 10 minutes. This makes them a perfect combination to create a sample use case.
PygeoAPI
is a Python server implementation of the OGC API suite of standards. It enables users to deploy a RESTful OGC API endpoint. To deploy a pygeoapi server on a Linux based system, follow these steps:
Installation
1) First, create a virtual environment with Python and activate it.
python -m venv pygeoapi
cd pygeoapi
. bin/activate
2) Clone the pygeoapi git repository and install the required supporting libraries.
git clone https://github.com/geopython/pygeoapi.git
cd pygeoapi
pip install -r requirements.txt
python setup.py install
3) Additionally, install the GDAL library for publishing a wide variety of spatial file formats, such as shapefile, dxf, gpx, and kml.
pip install --global-option=build_ext --global-option="-I/usr/include/gdal" GDAL==`gdal-config --version`
Configuration
Once you have installed pygeoapi, it is time to set up a configuration. Pygeoapi’s runtime configuration is defined in the YAML format, which is then referenced via the PYGEOAPI_CONFIG environment variable. A detailed guide on the configuration options is available here.
However, for the purpose of this example, we will leave all the configuration settings to their default.
Publishing data
Once the server is installed and configured, it is ready to publish any data. First, download the sample dataset used in this example. We store the dataset files inside the pygeoapi/tests/data/ directory.
1) In order to publish any dataset, the resources section in the config.yml file needs to be updated. To do that, create an example file with:
cp pygeoapi-config.yml example-config.yml
nano example-config.yml
2) Update the configuration file by adding this template to the resources section:
karlsruhe:                   # A name for identifying the dataset
        type: collection
        title: Karlsruhe     # Title to be displayed in the list of collections
        description: pois    # Brief description regarding dataset content
        keywords:
            - pois           # Relevant keywords/tags for categorising
        links:
            - type: text/html
              rel: canonical
              title: information
              href: https://www.disy.net/en/  # A link to the dataset source
              hrefland: en-US
        extents:
            spatial:
                bbox: [7.912903,48.883231,8.723831,49.135003]   # Area of interest (min Long, min Lat, max Long, max Lat)
                crs: http://www.opengis.net/def/crs/OGC/1.3/CRS84
        providers:
            - type: feature
              name: OGR
              data:
                source_type: ESRI Shapefile
                source: tests/data/karlsruhe/gis_osm_pois_free_1.shp # Path to the local file that contains the data
                source_options:
                  ADJUST_GEOM_TYPE: FIRST_SHAPE
                gdal_ogr_options:
                  SHPT: POINT             # Shape type (Point, Line, Polygon) of features in the dataset
              id_field: osm_id            # Unique id column of feature elements in the dataset.
              layer: gis_osm_pois_free_1  # Name of the feature layer in the dataset.
Make sure that the source path points to the data file containing the sample dataset you downloaded from our repo. Now, save the file and exit the editor. A user guide on publishing spatial data is available here, while detailed information on configuration options is available here.
3) Finally, set the environment variables to the created example config file and initialize the server.
export PYGEOAPI_CONFIG=example-config.yml
export PYGEOAPI_OPENAPI=example-openapi.yml
pygeoapi generate-openapi-document -c $PYGEOAPI_CONFIG > $PYGEOAPI_OPENAPI
pygeoapi serve #Initializing
On successful initialization, the output should look like this:

pygeoapi serve
Data visualization
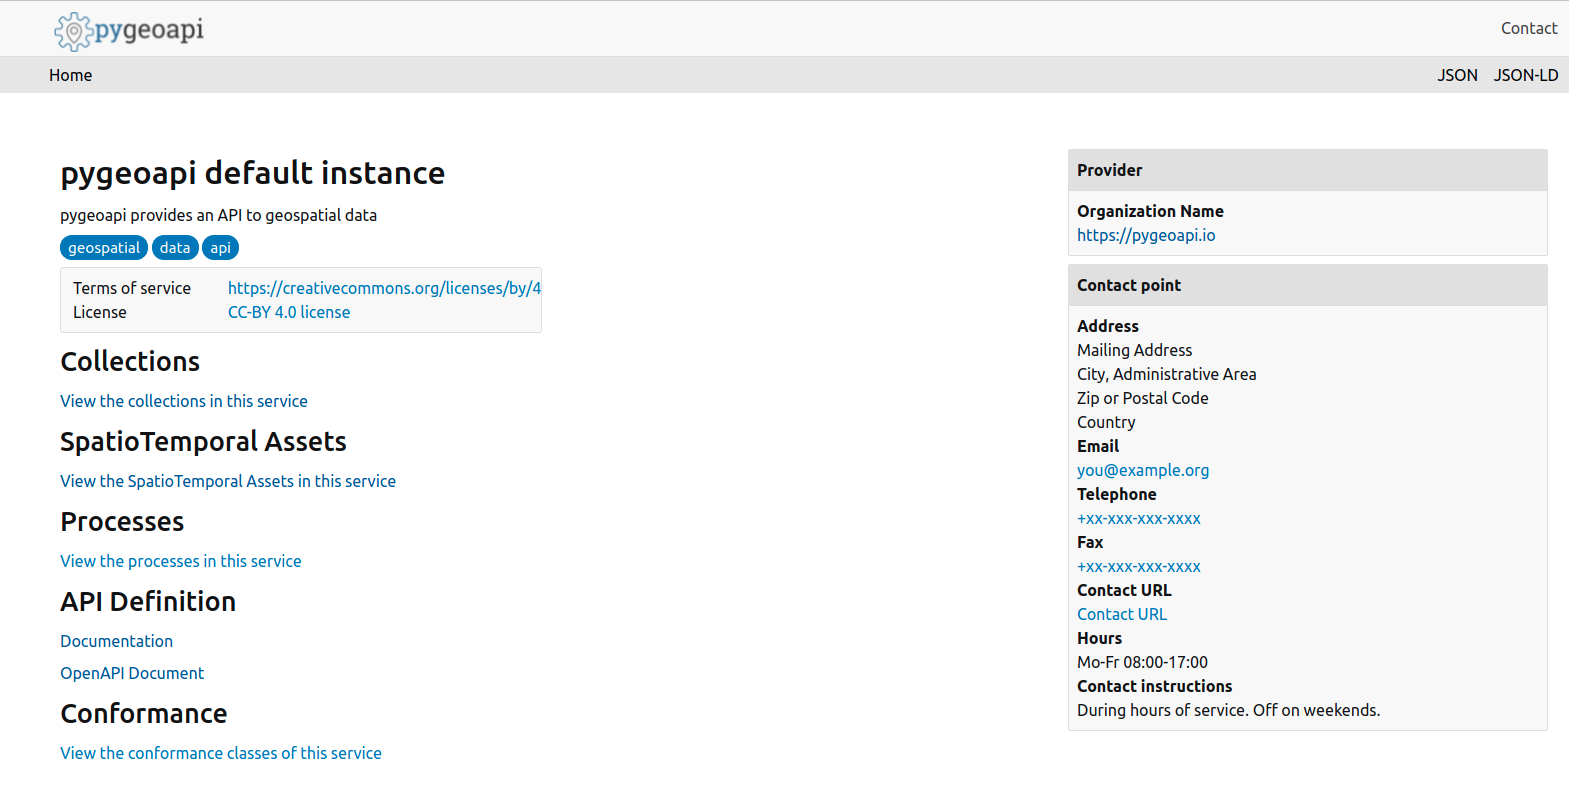
1) To visualize the published dataset, open a web browser and access http://localhost:5000/ to view the running server:
2) Click on the ‘View the collections in this service’ to view a list of all published datasets on the server. Then select the ‘Karlsruhe’ dataset and click on the ‘Browse through the items..’ to open the list of items in the collection.
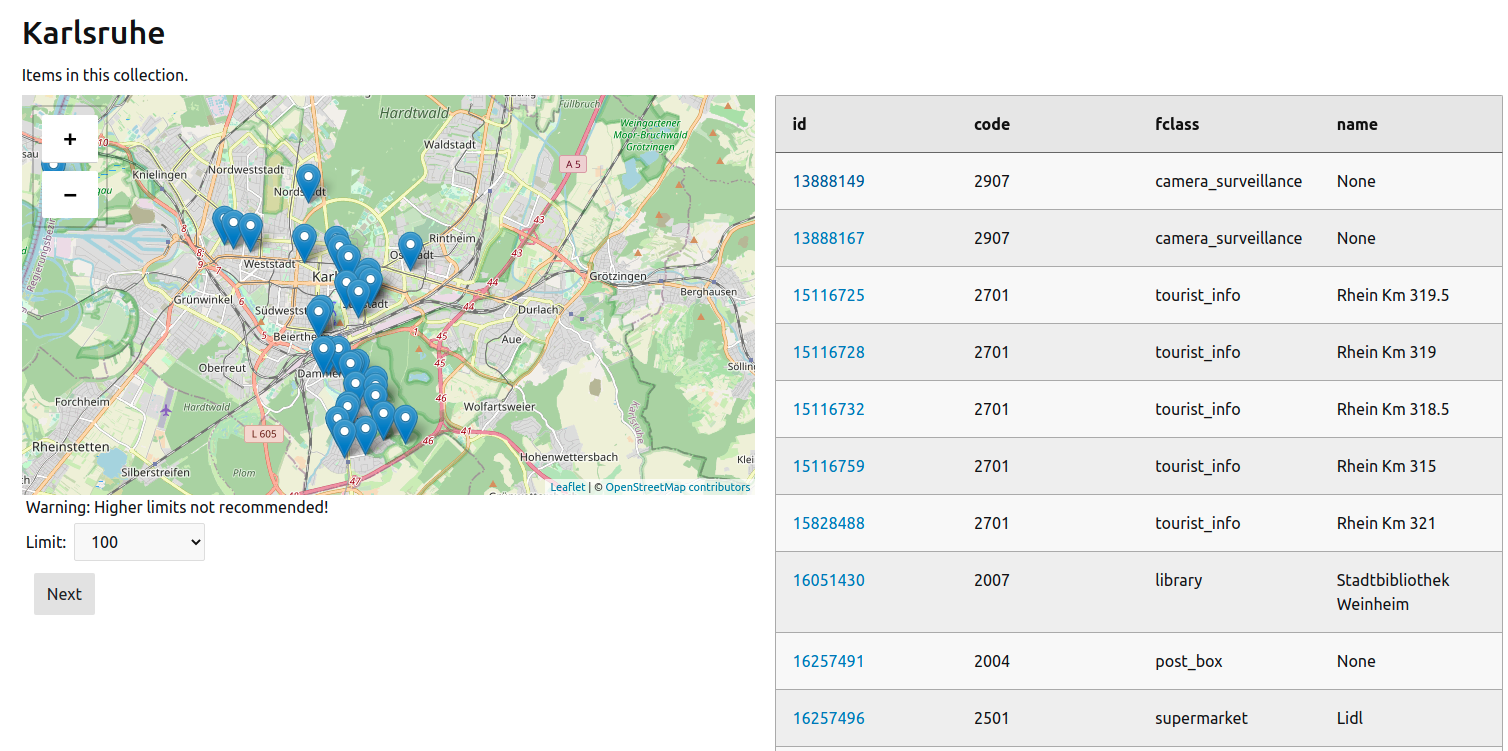
3) The features present in the dataset can be spatially viewed in the map window and can also be viewed as JSON by clicking on the JSON option on the top-right corner of the webpage.
Accessing the data
A client implementation is a GIS software or library that can connect to APIs that implement OGC API Features. This section describes how to use such a client implementation to connect with an API. For the purpose of this demonstration, we use a Python based client: OWS Lib.
OWS Lib
is a Python package for client programming with OGC interface standards and related content models. It enables users to access any OGC API based service (detailed guide).
1) Install OWSLib package and the supporting libraries required for XML and JSON parsing. Then, initialize the Python environment.
pip install OWSLib
pip install lxml
pip install json
python3
2) Import the required module from the OWSLib for handling the inbound data type. For example, to query the feature data, import the Features module as shown below. Additionally, import the JSON module for viewing the incoming JSON package. Add this to a Python file:
from owslib.ogcapi.features import Features
import json
3) Pull and store the feature dataset using the URL of the target service.
feature_dataset = Features('http://localhost:5000/')
4) Now, feature_dataset holds our feature dataset. Accordingly, the list of collections available on the server can be queried as follows:
collections = feature_dataset.collections()
print(json.dumps(collections, indent=4))
5) To access a particular collection, specify the dataset name from the available datasets.
karlsruhe = feature_dataset.collection('karlsruhe')
print(json.dumps(karlsruhe, indent=4))
6) Next, view the queryable parameters available in the dataset. This will be used later on for making the queries.
karlsruhe_queryables = feature_dataset.collection_queryables('karlsruhe')
print(json.dumps(karlsruhe_queryables, indent=4))
7) Now, to access items from the desired collection, use collection_items.
karlsruhe_items = feature_dataset.collection_items('karlsruhe')
print(json.dumps(karlsruhe_items, indent=4))
8) Finally, extract feature items from the dataset and store them in a variable
karlsruhe_features = karlsruhe_items['features']
9) Hereafter, use this variable to access any feature. For example, to view properties of a specific feature:
karlsruhe_query['features'][0]['properties']
For a more detailed guide on accessing a Feature dataset, refer to the official documentation.
Querying the data
To obtain a subset of relevant data from the dataset, part 3 of the OGC API Features covers the filtering and querying of the published features dataset.
1) The first step of querying a dataset is to create a target URL. This is the structure of a query url:
server_address/collections/dataset_name/items?queryable_parameter=X&limit=Y
server_address: URL of the target servicedataset_name: name of the desired datasetqueryable_parameter: any parameter from the queryable parameters (obtained in previous section)limit: amount of features to be fetched
For our example we use this:
query_url = http://localhost:5000/collections/karlsruhe/items?fclass=library&limit=100
This particular query will fetch the first 100 feature elements that have fclass = library. In addition to this, we can add more queryable features or define a temporal/spatial filter as per requirement. For more examples on defining a query_url, refer to this guide from pygeoapi.
2) Install the requests lib:
pip install requests
import requests
3) Run the HTTP request with our crafted query_url to get the data as JSON:
response = requests.get(query_url)
data = response.json()
Analyzing the data
Once we have queried the data and stored features in a variable, we can perform different analytics operations on the data.
1) First we install the GeoPandas lib for carrying out the data analytics:
pip install geopandas
import geopandas as gpd
Besides its cute name, GeoPandas is very useful for working with spatial data in Python.
2) Next, convert the feature data into a normalized Geopanda data frame:
normal = gpd.GeoDataFrame.from_features(data['features'])
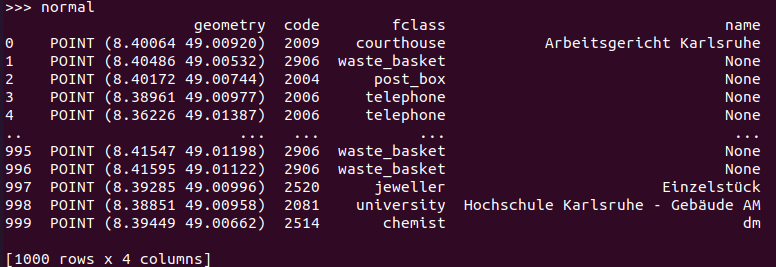
3) Now, apply the required operation on the dataframe. For example, to calculate the count for each class of feature:
normal.groupby(['fclass'])['name'].count()
![Terminal output of `normal.groupby(['fclass'])['name'].count()`](/assets/img/posts/2021-08-ogc-api-geopanda-groupby.png)
Accordingly, we can run different operations on the feature dataset as per our requirements.
Furthermore, this data can be republished on any OGC API based service or can be imported to our Geo Analytics software, Cadenza. For more in-depth information regarding this topic, please feel free to contact Julian from our friendly team.
This brings us to the end of this blog. We hope that the information provided here was helpful for the users planning to publish their first dataset using OGC Features API.
Additional Resources
- Spatially enabling Web APIs through OGC Standards By Dr Gobe Hobona: https://www.youtube.com/watch?v=8_Jz9cV8BAo
- Introduction to OGC API: https://inspire.ec.europa.eu/sites/default/files/ogc_apis_introduction.pdf
- OGC API documentation: http://opengeospatial.github.io/e-learning/ogcapi-features/text/basic-main.html
References
- OGC API for Publishing Vector Geospatial Data: https://www.gim-international.com/content/news/new-ogc-api-for-publishing-vector-geospatial-data-in-any-coordinate-reference-system
- OGC APIs Whitepaper: http://docs.opengeospatial.org/wp/16-019r4/16-019r4.html
- OGC APIs Features: https://github.com/opengeospatial/ogcapi-features
- ISO 19168-1:2020: https://www.iso.org/standard/32586.html
- INSPIRE directive: https://inspire.ec.europa.eu/portfolio/good-practice-library
- PygeoAPI documentation: https://docs.pygeoapi.io/en/latest/index.html
- OWSLib: http://geopython.github.io/OWSLib/index.html
This work was funded by the research project AIFER, funded by the BMBF and the EU Horizon 2020 innovation action NAIDES, grant agreement No. 820985 .
The title image was published by Frédérick Tubiermont under the Unsplash License.
Share via


